How I Built a “Squat Rack” Using Old Cabinets
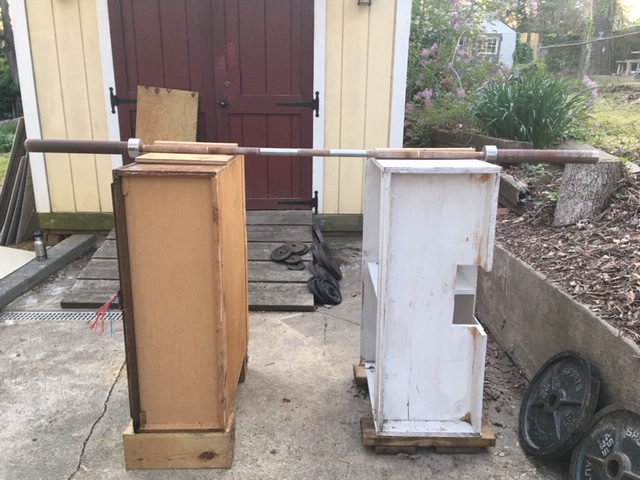
Completed “squat rack”
May 1, 2020
If this article is at all helpful for you, you are in the same strange position I have found myself: I have a barbell and plates, but no setup which I can use for squatting. If you aren’t in this odd position and are reading this anyway, I hope to bring you some entertainment because this whole undertaking was somewhat ridiculous and hopefully funny to read about.
The idea to attempt something of this nature was first suggested to me by my physical therapist. I was expressing my desire to squat while under the stay at home order and she suggested that I build something which would put the bar at a height which I could walk under and back squat like normal. We initially first thought of using cinder blocks but some days later my very smart and very crafty mom came up with a better idea. This is how my mom and I attempted to build a “squat rack” with old cabinets.
First we needed cabinets, luckily we already had two of the same height which, if turned on the side, came up to about elbow height. The main task would be to elevate them to a height which wouldn’t be too awkward to stand up from. We found four pieces of 6”x 6” wood which in reality was more 5.5” x 5.5”. We placed the 6”x6” pieces on the ground and then lifted the cabinet and placed it on top of the wood. Those pieces would become the “feet” as my mom referred to them. We position the “feet” at the ends of the cabinet with the minimum amount sticking out on either side. We didn’t try to trim the 6”x 6” because their width would make it hard to cut through.
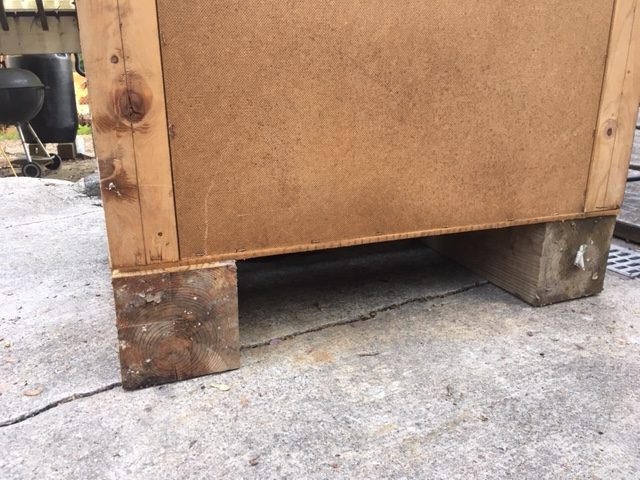
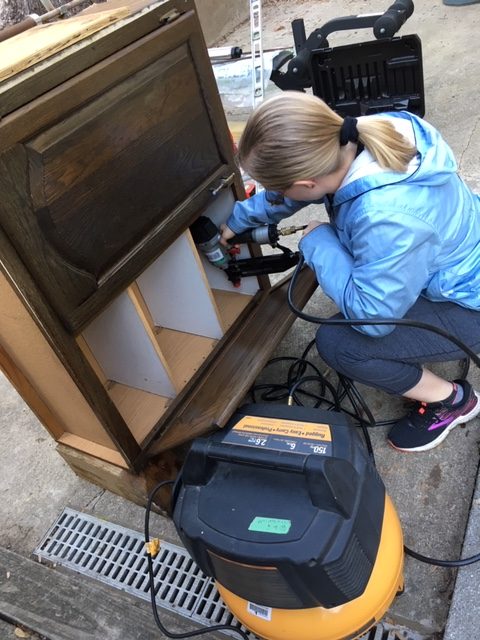
Using a nail gun we secured the cabinet to the “feet”. To get good angles we had to open the doors on the cabinets and nail from the inside of the cabinet. We used about 6 or 7 nails per “foot” to make sure nothing was moving. For some reason, the nails weren’t going the whole way into the wood so the heads were sticking out of the cabinet a bit. I used a hammer to hit the nails the rest of the way in. Once the first “foot” was secure we adjusted the cabinet to realign the other foot and nailed it down just like we did with the first one. After the “feet” were both secure I used twine to tie the cabinet doors shut.
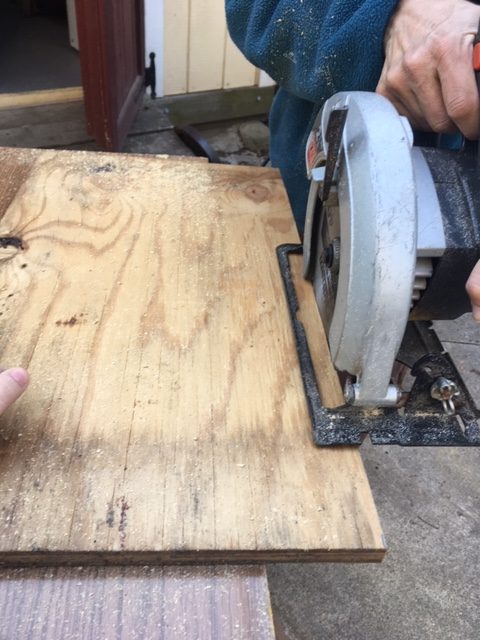
Next, we cut and nailed another thin sheet of wood to the top of the cabinet to get the height of the cabinets to match each other.
I then measured 10 inches from the back edge of the cabinet and drew a line in pencil. On that line we nailed down a pre-trimmed 2”x 4” which would function as a sort of stopper to keep the barbell from potentially rolling off the cabinets. The first cabinet was completed! We just had to do it all over again with the other one.

If you want to try this yourself here are the materials and steps I would recommend:
Materials:
- Two old cabinets of similar heights
- Extra wood of various widths and lengths
- Air compressor
- Nail gun
- Nails
- Hammer
- Extension cord
- Circular saw
- Pencil
- Measuring tape
- Twine or a short piece of rope
Steps:
- Find two cabinets and position them so they are as close as possible to the desired height
- Position the wood for the “feet” on the ground then lift the cabinet onto the feet
- Use a nail gun and nails to secure the first “foot” to the cabinet (make sure an appropriate length of nail is used)
- Use a hammer to push the nails the rest of the way into the wood if needed
- Re position the other “foot” to make sure it is properly aligned with the already secured foot and repeat steps 3 and 4
- If the cabinet has doors, use twine/string to secure the doors in a closed position so they do not get in the way in the future. Removing the doors is also an option if the inside of the cabinet is needed for storage.
- If the “feet” do not bring the cabinet up to the desired height on their own, boards can be secured with a nail gun to the top of the cabinet until the desired height is reached. If needed, trim boards with circular saw to fit to the top of the cabinet.
- Measure approximately 10” from the rear end of the cabinet and draw a line in pencil
- Take a 2”x4” or a 2”x3” and trim it to a length which matches the width of the cabinet using a circular saw
- Nail it down on the line using the nail gun and hammer if necessary
- Repeat steps 2 through 10 on the other cabinet
Some additional notes: Most importantly, this setup does not contain a safety of any kind so when using this setup or one similar, make sure you can bail out of the lift safely since there is nothing to catch the bar if you fail. Try this project with a family member or other house mate. Maneuvering cabinets solo could hurt your back and a project is always more fun with a buddy. Also, it should be considered that my mother and I are both extremely short. This meant we did not need to make very tall “feet”. If you are of average height or tall, make sure the “feet” create a wide enough base to support the height you are building up, to decrease fear of cabinets tipping over.
A brief plea: Please only engage in any sort of construction type of activity if you know how to safely use the equipment and/or are building with a partner with plenty of experience. Also please only do home workouts you can do with proper technique without hurting yourself. If you are not a fairly experienced lifter please do not try lifting without the guidance of a coach. This is not the time for injuries. Stay safe and I hope this how to was helpful or, at the very least, a funny read.